Follow Me On Social Media!

Stained Glass Cookies: Irresistibly Colorful & Fun to Make
Introduction to Stained Glass Cookies
Have you ever gazed at a beautiful stained glass window, marveling at how the light dances through the vibrant colors? This mesmerizing effect can be replicated in the kitchen with stained glass cookies, which offer a delightful combination of sweet treats and a stunning visual appeal. Picture hosting a gathering where these cookies become the centerpiece, enchanting your guests with their candy-filled allure while serving as a delicious conversation starter.
What makes stained glass cookies so special? First and foremost, they invoke a sense of nostalgia. Perhaps you remember joining your mom or grandmother in the kitchen, rolling out dough and cutting out shapes, eager to create edible art. This fun twist on traditional sugar cookies is not just about taste; it’s about tapping into creativity and reliving fond memories.
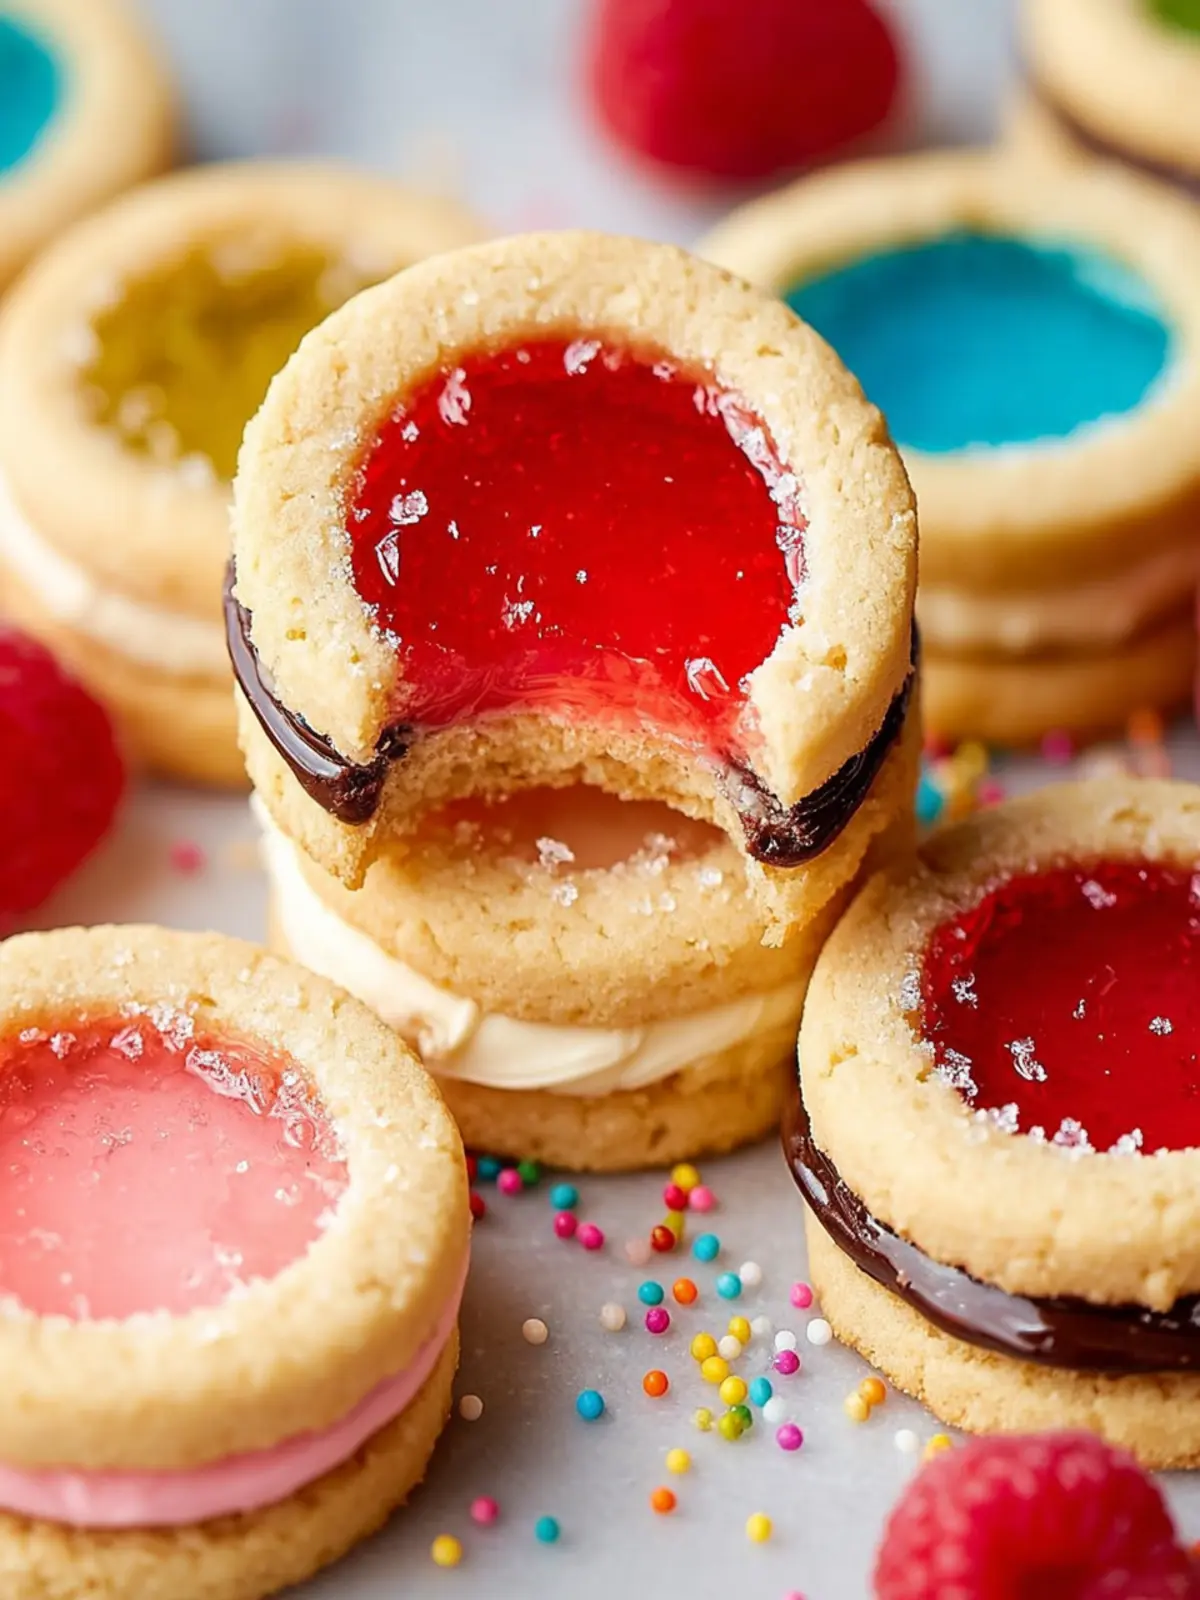
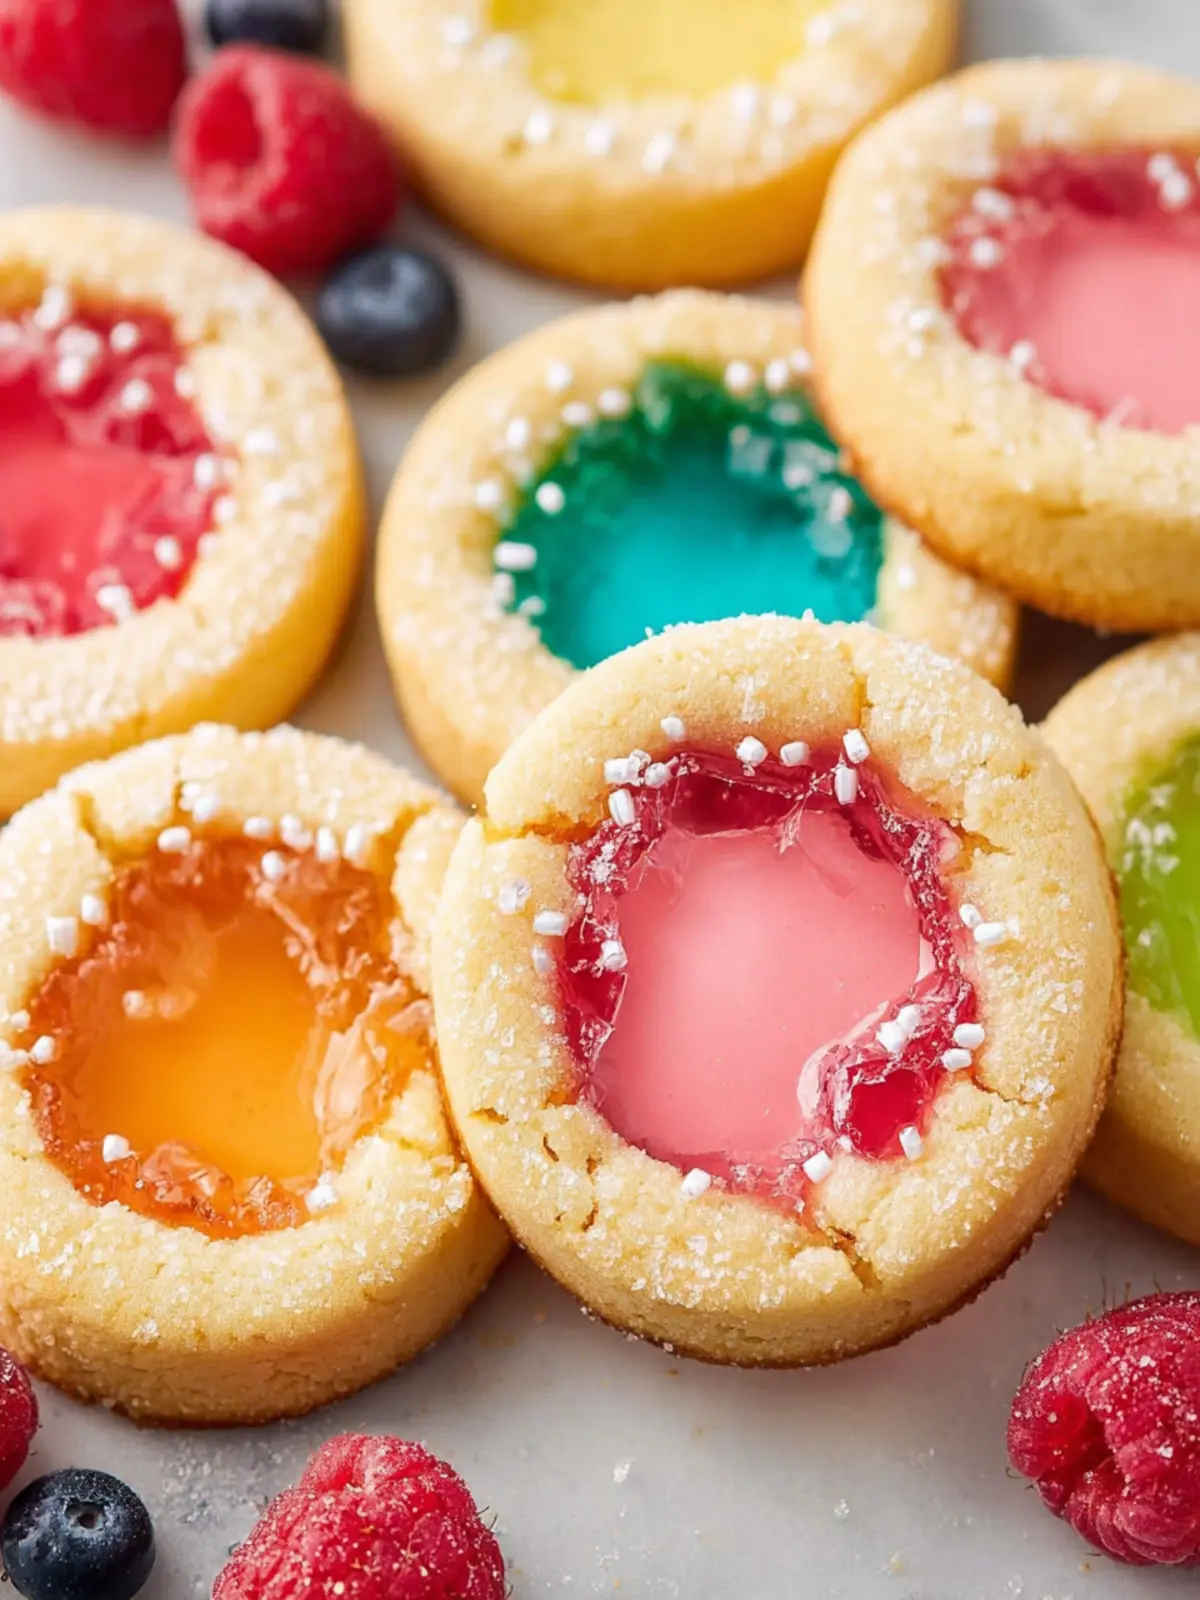
When you take a bite of these delightful cookies, you’re greeted with a satisfying crunch followed by a chewy texture from the stained glass center, which is crafted from hard candies that melt beautifully during baking. The vibrant colors peek through, creating a captivating design that haunts your taste buds long after the last cookie is devoured.
But where do we start? Making stained glass cookies involves a straightforward process that can be enjoyable for bakers of all skill levels. The key ingredients to look out for include:
- Sugar and Butter: These form the base that creates a soft, tender cookie.
- Eggs: Essential for binding and enriching the dough.
- Flour: The foundation of your cookie, providing structure.
- Hard Candies: The real stars of the show, these candies melt in the center, creating that signature stained glass effect.
With a little patience and creativity, you can make stained glass cookies that will not only impress those who enjoy them but also spark joy and nostalgia for the moments spent creating this masterpiece. So roll up your sleeves, gather your ingredients, and let’s dive into this colorful journey of cookie-making!
Key Ingredients for Stained Glass Cookies
Creating stained glass cookies is both an art and a science, and having the right ingredients makes all the difference. Each component plays a crucial role in achieving that perfect blend of flavor and visual appeal.
Butter
Rich, unsalted butter is essential for a deliciously creamy texture. It not only adds flavor but also ensures that our cookies remain tender and melt-in-your-mouth delightful. Be sure to let it soften at room temperature so that it blends well with the sugars.
Sugar
Using a combination of granulated sugar and brown sugar gives these cookies the ideal balance of sweetness and moisture. The brown sugar contributes a hint of caramel flavor, enriching the overall taste of your stained glass cookies.
Flour
All-purpose flour is the base of these cookies. It provides the strength needed for structure while keeping their texture light. For a gluten-free option, simply use a 1:1 gluten-free flour blend.
Eggs
Eggs act as a binding agent, providing moisture and structure. The yolk adds richness, while the whites help the cookies rise without being too cakey.
Corn Syrup
This key ingredient is used to create the vibrant, shiny “glass” effect. Melted hard candies will blend beautifully with corn syrup, resulting in a stunning finish that’s truly eye-catching.
Hard Candies
For that magical stained glass effect, colorful hard candies, like Jolly Ranchers, are perfect. Crush them into small pieces which melt and create a stunning translucent center when baked.
With these key ingredients in hand, you’re well on your way to making stained glass cookies that are not only delicious but also a feast for the eyes!
Why You’ll Love These Stained Glass Cookies
Imagine a baking adventure where stained glass cookies are the main characters, stealing the show with their vibrant colors and delightful crunch. What’s not to love about these eye-catching treats? They are not just cookies; they’re a celebration of creativity and flavor that enchants family gatherings, holiday parties, or cozy afternoons at home.
A Feast for the Eyes and Taste Buds
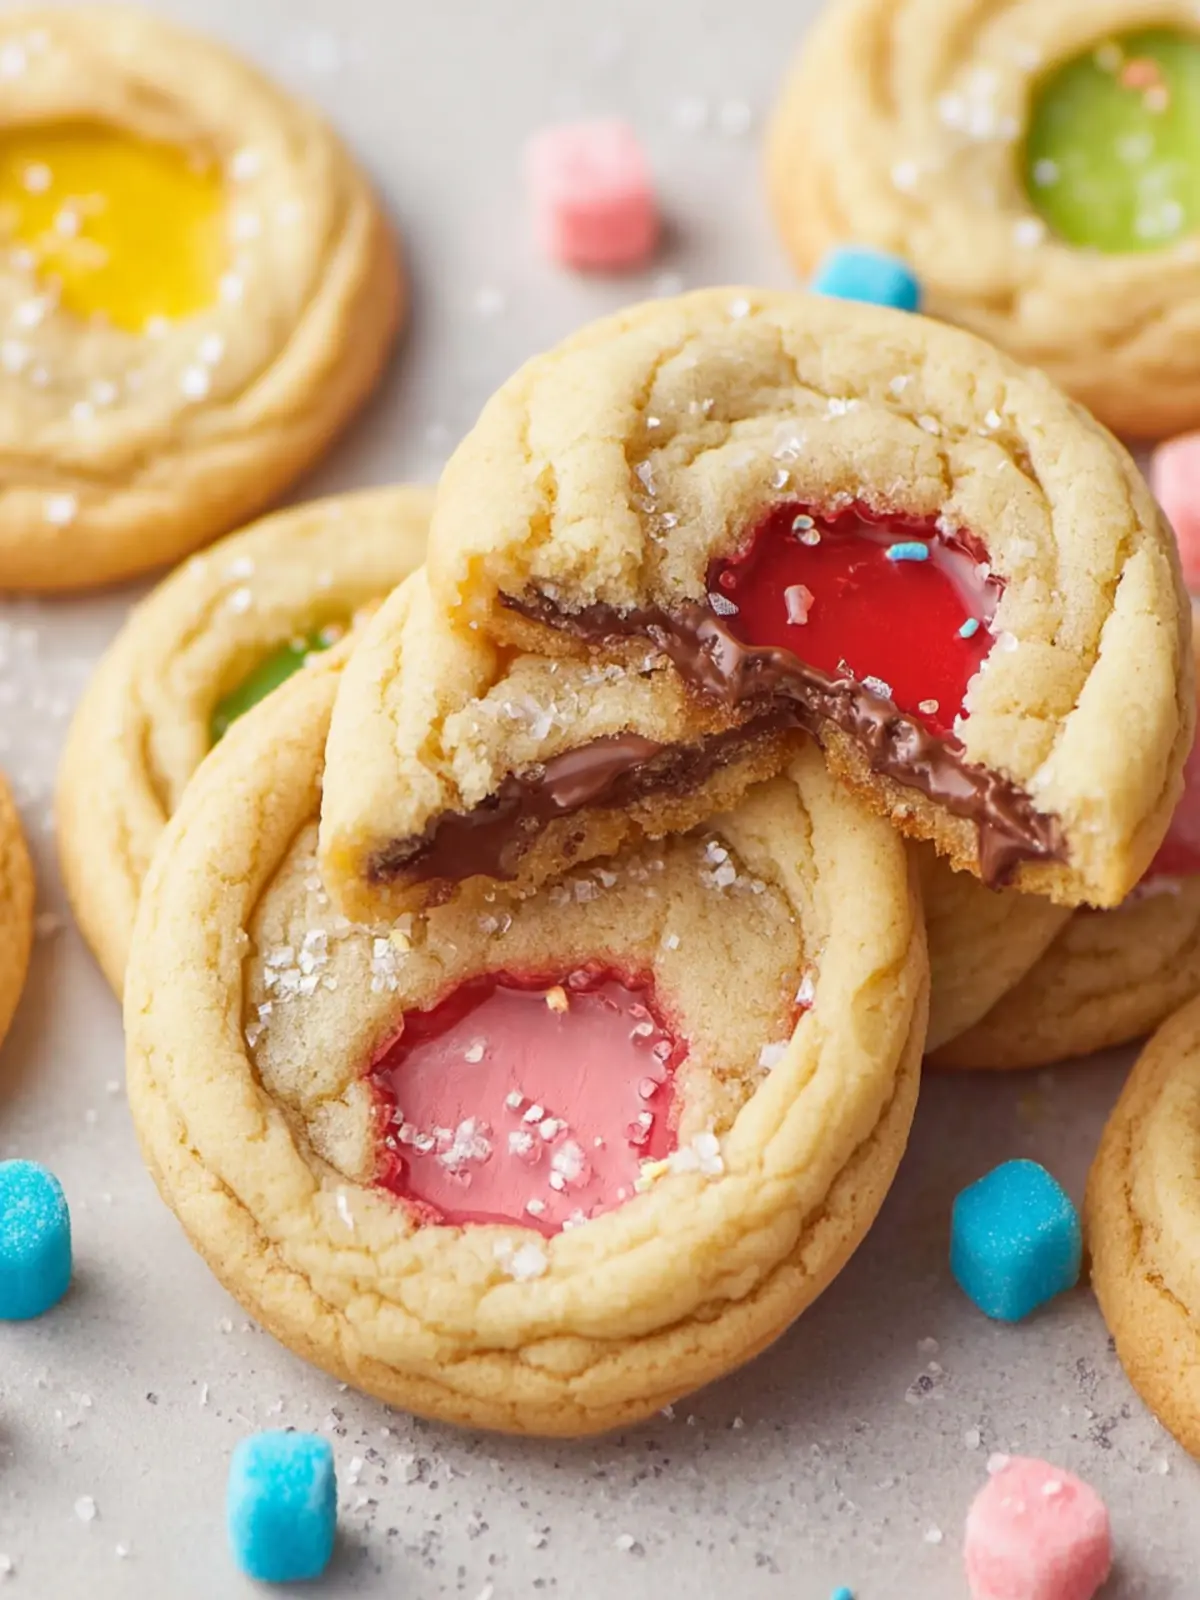
The striking visual appeal of stained glass cookies draws you in immediately. Made with simple ingredients like flour, sugar, and butter, these cookies transform into artistic masterpieces when you press colorful hard candies into the center before baking. The melting candies create a translucent “glass” effect that makes each cookie a unique masterpiece.
- Fun for Everyone: Baking these cookies isn’t just for seasoned bakers; it’s an activity the whole family can enjoy. Kids will love unwrapping candy and choosing colors, while you can guide them through the mixing and shaping process.
- Perfect for Any Occasion: Whether it’s Christmas, birthdays, or just a sunny Saturday, these cookies fit right in, making them a versatile treat everyone will be excited to share.
- Delicious Flavor: The buttery base paired with the sweet, sticky goodness of melted candy offers a delightful contrast that keeps you coming back for more.
So, roll up your sleeves and get ready to create something extraordinary that will brighten up your dessert table!
Cooking Tips and Notes for Stained Glass Cookies
Creating beautiful stained glass cookies isn’t just about the aesthetics; it’s a delightful experience filled with vibrant colors and delicious flavors. Here are some handy tips to ensure your cookies turn out perfectly every time.
Choosing the Perfect Candies
- Hard Candies: I recommend using classic hard candies like Jolly Ranchers or Lifesavers for the centers. They melt beautifully and provide that brilliant stained glass effect.
- Color Combinations: Feel free to mix and match colors for a stunning visual. Think about using reds and greens for the holiday season or pastels for springtime delights.
Dough Consistency Matters
- Chilling the Dough: After mixing your dough, be sure to chill it for at least 30 minutes. A well-chilled dough will hold its shape better while baking, ensuring that those intricate shapes remain defined.
- Rolling Technique: Roll the dough evenly to about 1/4-inch thickness. This uniformity helps ensure that the cookies bake evenly.
Baking Like a Pro
- Oven Temperature: Always preheat your oven to 350°F (175°C). An oven that’s too hot can cause the edges of the cookies to brown too quickly, while an oven that’s too cool might leave them soft.
- Cooling Time: Don’t rush the cooling process! Let the cookies cool on the baking sheet for a few minutes before transferring them to a wire rack. This helps prevent breaking.
With these tips, your stained glass cookies will not only taste great but also look stunning—perfect for any celebration or just a sweet treat at home!
Serving Suggestions for Stained Glass Cookies
Stained glass cookies are as much a visual delight as they are a treat to eat, making them perfect for any occasion. When it comes to serving, there are plenty of creative ways to present these colorful confections.
Creative Presentation
-
Cookie Platters: Arrange your stained glass cookies on a vibrant platter, mixing in some holiday-themed decorations or edible flowers for an enchanting touch. This makes them an instant centerpiece at parties.
-
Gift Packaging: Consider wrapping individual cookies in clear cellophane bags tied with festive ribbons. They make heartfelt gifts for friends or coworkers, especially around the holidays.
-
Themed Parties: For a festive gathering, serve the cookies alongside themed drinks. Think hot chocolate or a refreshing fruit punch that complements the cookies’ colors.
Pairing Ideas
-
Beverages: Pair your stained glass cookies with a warm cup of tea or coffee. The sweetness of the cookies contrasts wonderfully with the bitterness of the beverages.
-
Dessert Buffets: They’re a show-stopper at dessert tables, where guests can choose from a variety of sweets.
Embrace your creativity! Whether you’re baking for a party or just for fun, serving your stained glass cookies with flair will elevate any gathering.
Time Breakdown for Stained Glass Cookies
Creating stained glass cookies is a delightful experience, and understanding the time it takes can set you up for success. Here’s how the timeline breaks down:
Preparation Time
Start by setting aside about 30 minutes for prep work. This includes mixing your dough, rolling it out, and cutting out those fun shapes, making sure to leave space for the candy in the center.
Baking Time
Once your cookies are ready, pop them in the oven for about 10-12 minutes. This quick bake allows them to hold their shape while the candy melts into that beautiful stained glass effect.
Total Time
In total, you’re looking at around 40-45 minutes from start to finish. This means you’ll soon have a batch of scrumptious stained glass cookies to share (or keep for yourself)! Happy baking!
Nutritional Facts for Stained Glass Cookies
Creating stained glass cookies is not only about the art of baking but also about enjoying tasty treats in moderation. Understanding the nutritional values helps you savor each bite even more.
Calories
Each cookie contains around 100 calories, making them a delightful addition to your treat rotation without overwhelming your calorie intake.
Sugar
With about 12 grams of sugar per cookie, these gorgeous confections offer a sweet burst of flavor, highlighting the colorful candies that melt perfectly in the center.
Fats
The cookies contribute roughly 4 grams of fat, which comes from the butter used in the dough. This fat enhances the rich, buttery flavor and crumbly texture that makes them irresistible.
Enjoy every moment of creating and indulging in your stained glass cookies!
FAQs about Stained Glass Cookies
When I first dove into the enchanting world of stained glass cookies, I was captivated not only by their colorful appearance but also by the fun and creativity involved in making them. If you’re curious about some common questions surrounding these delightful treats, you’ve come to the right place!
Can I use different types of hard candies?
Absolutely! While traditional stained glass cookies often use bittersweet or fruity flavors, feel free to experiment with different types of hard candies. Some bakers love using Jolly Ranchers for their vibrant colors, while others prefer those classic peppermint hard candies for a festive twist. Just remember that the flavor of the hard candy will influence the final product, so choose something you enjoy.
How do I store Stained Glass Cookies?
Storing your stained glass cookies is quite simple. Keep them in an airtight container at room temperature. This will maintain their crunchiness while preventing the candies from becoming sticky. If you want to extend their shelf life, you can also refrigerate them, but be cautious as moisture can affect the texture of the cookies.
What other shapes can I use for the cookie cutters?
The beauty of stained glass cookies lies in their versatility! Traditional shapes, like stars and hearts, work wonderfully, but don’t hesitate to let your imagination run wild. Think seasonal themes—like Christmas trees or Easter eggs—or even fun shapes like animals. The key is to ensure that the center cut out is large enough to fill with your hard candy. Get creative, and enjoy the process!
Conclusion on Stained Glass Cookies
Stained glass cookies are more than just visually appealing treats; they are a wonderful way to celebrate creativity in the kitchen. The beauty of these cookies lies not only in their colorful, jewel-like appearance but also in the delightful blend of flavors that come from combining comforting sugar cookies with smooth, flavorful hard candies.
As you try your hand at these delightful creations, remember that they spark joy and invite collaboration. Whether you bake them for the holidays, parties, or just a fun weekend project, these cookies are sure to be a hit. So gather your friends or family, and enjoy the shared process of rolling, cutting, and glazing—happy baking!
Print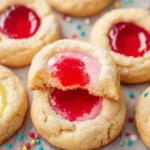
Translucent Candy Cookies
- Total Time: 40 minutes
- Yield: 24 cookies 1x
- Diet: Vegetarian
Description
Delicious cookies filled with translucent hard candies that create a beautiful, colorful center.
Ingredients
Scale
- 1 cup unsalted butter (softened)
- 1 cup granulated sugar
- 1 teaspoon pure vanilla extract
- 1 large egg (at room temperature)
- 3 ½ cups all-purpose flour
- 1 ½ teaspoons baking powder
- ½ teaspoon salt
- 36 translucent hard candies (unwrapped)
Instructions
- Preheat the oven to 350°F (180°C), or 160°C fan oven. Prepare a cookie sheet by lining it with parchment paper or silicone mat and set aside.
- In the bowl of a stand mixer with a paddle attachment or a mixing bowl with a hand mixer, cream the butter with the sugar until smooth, light in color, and creamy (2-3 minutes).
- Add vanilla and egg and mix again until the egg is incorporated but don’t over whip (the longer you whip the egg, it can souffle up and the cookies will rise and you don’t want that).
- Add in the flour, baking powder, and salt and mix again until just combined. Scrape the sides with a spatula so no dry flour is left.
- The cookie dough should pull away from the sides of the bowl (if it doesn’t, add up to ½ cup of additional flour).
- Divide the dough into 4 portions, and roll out each using a rolling pin into ¼ inch thickness.
- Cut out shapes using a larger cookie cutter for the outer shape and a smaller cookie cutter for the inner shape. Then with the help of an offset spatula, transfer to the cookie sheet.
- Place one unwrapped hard candy in the empty center of each cookie. If your inner shape is too small you may crush the candies to create smaller pieces. Avoid having the candy touch the edges of the cookie.
- Bake for 8 minutes (one sheet at a time), then check the cookies – if the candies are bubbling or close to bubbling, remove the cookies from the oven for 2 minutes, then return to the oven for an additional 2 minutes or until the cookies are set. To obtain a clean final look you want to avoid having the candies bubble up too high.
- When cookies are set, remove from the oven and allow to cool on the cookie sheet completely.
- Store in an air tight container for up to 1 week.
Notes
- For best results, make sure the butter is softened properly before mixing.
- Keep an eye on the cookies as they bake to prevent the candies from overheating.
- These cookies can be stored in an airtight container for up to 1 week.
- Prep Time: 30 minutes
- Cook Time: 10 minutes
- Category: Dessert
- Method: Baking
- Cuisine: American
Nutrition
- Serving Size: 2 cookies
- Calories: 150 per cookie
- Sugar: 12g
- Sodium: 80mg
- Fat: 6g
- Saturated Fat: 3.5g
- Unsaturated Fat: 2g
- Trans Fat: 0g
- Carbohydrates: 20g
- Fiber: 0g
- Protein: 1g
- Cholesterol: 30mg